Last summer, Akio Kondo visited California to work and to teach bonsai. During a Bay Island Bonsai workshop, Kondo made an interesting suggestion for improving one of my pines. The tree looked great from a distance, but he quickly noticed that the tree had no interior buds. Without interior buds, the tree had no future. What to do?
I’ve been waiting a year to put his advice to the test. His suggestion was to decandle the tree in fall. Two of my trees made good candidates for the experiment. I decandled the first two weeks ago. I’m now getting to the second tree.
What’s the theory? Fall decandling is a two year process. By decandling late, “summer” buds have little time to develop. If the tree is healthy, it will produce adventitious buds in the tree’s interior.
If all goes according to plan, the tree will look silly in a few months – nothing but weak buds and old needles. Next spring won’t be much different. But as these new buds take hold, they set the stage for the following year. With a second year’s growth, the tree will regain its former vigor. So goes the theory.
Below are detailed shots of the decandling and needle-pulling process. I treated the tree like I would in spring, so the steps below apply equally to pines decandled in summer.
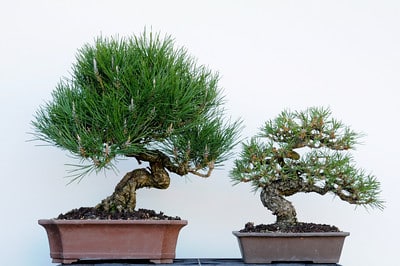
One down and one to go – decandling Japanese black pine bonsai
I hadn’t thought twice about the health of this pine until Kondo took a peek inside. The buds are very healthy for such a small pine.
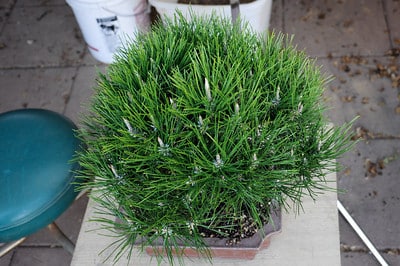
The tree looks full and healthy, right?
Looking inside revealed another story. Decandling, wiring, and selective pruning tend to stimulate back budding, but this entire tree needs new buds, and if the usual steps don’t work, the tree would require a lot of grafting.
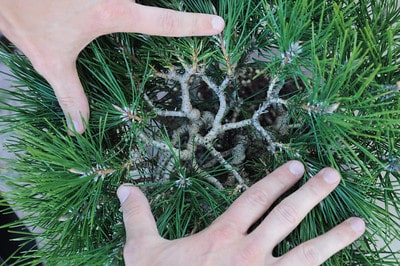
No buds inside
The lack of buds is likely the result of several years of cutback without wiring. I decandle the tree every year, but without wiring the new shoots into place, the new growth clusters together and prevents adventitious buds from sprouting.
The basic decandling process is simple: remove the spring growth just above the line of the old needles.
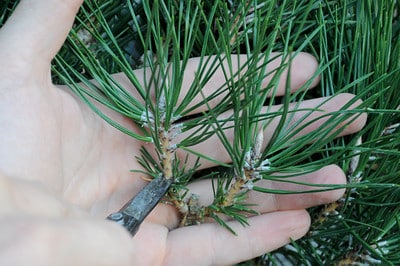
Positioning the scissors to cut the shoot
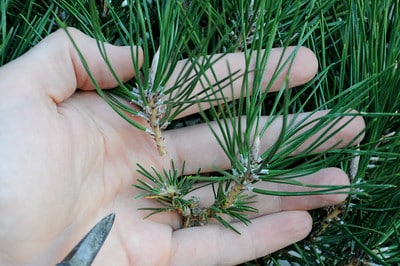
Spring shoot removed
There are, however, plenty of details. If I address the shoot with open scissors, I risk slicing last year’s needles.
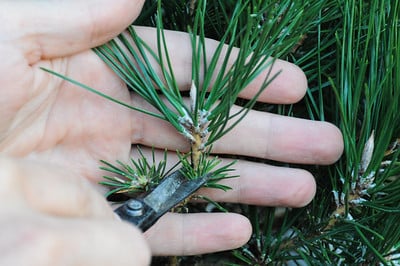
Careless scissor technique
To avoid this, I close the scissors as I address the shoot.
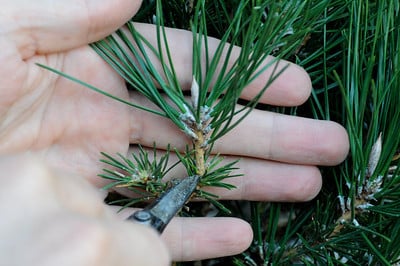
Approaching the shoot with scissors closed
I also try to make all of the cuts perpendicular to the direction of the shoot as angled cuts produce uneven growth.
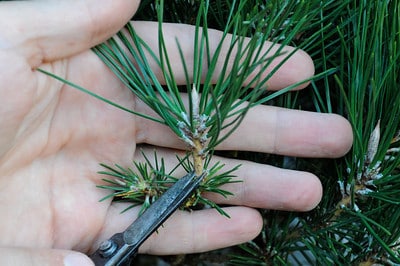
Steep cutting angles produce uneven growth
Once I line up the cut, I gently sever the shoot without jerking the scissors away.
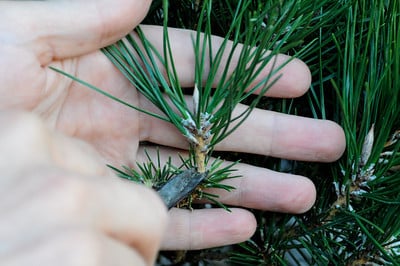
Scissors square, needles out or harm’s way; ready to cut
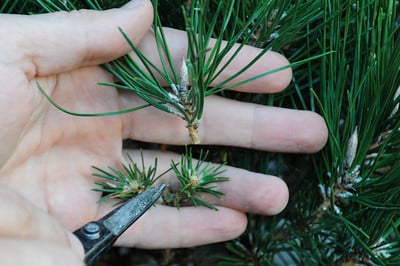
Spring shoot removed
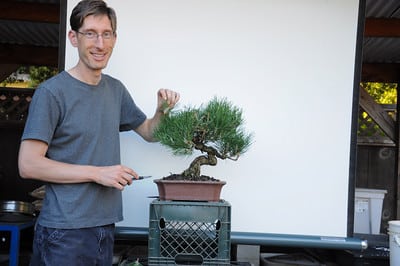
Decandling is fun!
After removing the new shoots, I removed needles from the stronger areas of the tree to promote more balanced growth next year.
I’ve been pulling needles with tweezers for years and still don’t have the speed that comes from the experience of the incessant pine work that many professionals face each fall. It’s an amazing thing to watch when it’s done well.
I try to grab each pair of needles at the base.
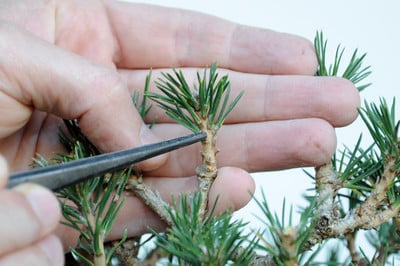
Grabbing pine needles with tweezers
If I pull the needles higher up, above the fascicle, I’ll need to go back to remove the fascicle.
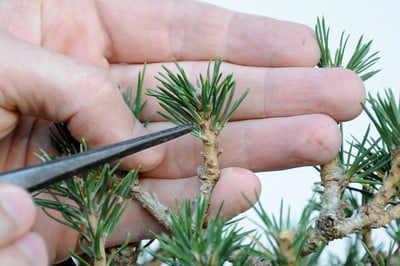
Pulling needles above the fascicle
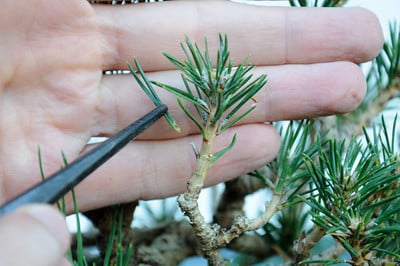
Needles removed – fascicle still in place
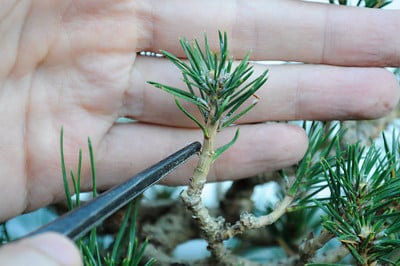
Grabbing the fascicle with tweezers

Fascicle removed
Many years ago, I asked Kondo if I should remove the bracts that sometimes grow beneath pine needles. He said yes. I noted that this could greatly increase the time it takes to complete the process. He smiled and agreed. When working for clients, professionals have to leave their trees clean. Clean trees look good and are easy to wire. I got back to work.
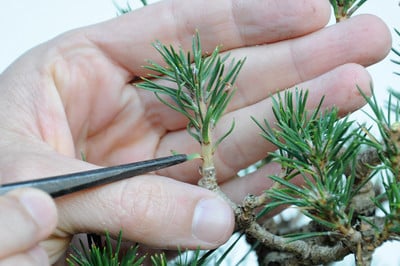
Removing a needle bract
When I finished pulling the bracts and needles, it became clear that the tree needed wiring. I’ll wait until late fall when the tree slows down a bit. In the mean time, plenty of light and air will get to the interior for the first time since last winter.
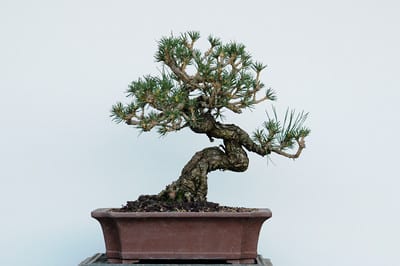
All cleaned up – ready for wiring
I’m very curious to see how the fall decandling experiment goes. Today the trees look great – and if all goes well, they’ll look good in the future too.
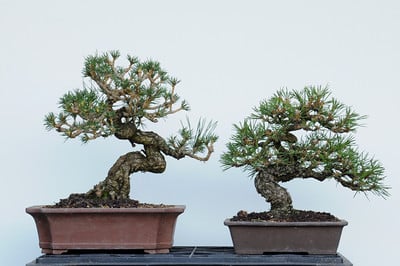
Fall decandling complete!
Subscribe to Indian Bonsai Art
New Posts Delivered Every Tuesday and Friday
