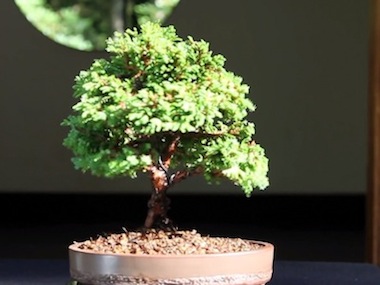
Buying a Bonsai tree in a shop is nice, but wouldn’t it be much cooler to do it yourself? A great way to start growing Bonsai trees is to buy a Bonsai tree kit and style the tree into a Bonsai.
A starterkit can be purchased at many (online) Bonsai shops, but you could also choose to buy only a young plant at a local garden center. This article (including a video) explains the steps to grow a Bonsai tree from a starterkit, all by yourself! We also sell a Bonsai DIY Starterkit within the US.
Bonsai tree kit, how to create your own Bonsai tree
A Bonsai kit usually contains a young plant (called a pre-Bonsai or a nursery stock), a Bonsai pot, wire and soil. From this young plant you can create a Bonsai tree in three steps; pruning, wiring and repotting. Starterkits are widely available at (online) Bonsai stores and should cost no more than $30 to $40 US. For a list of retailers and recommended online stores, read our article on “Bonsai trees for sale“.
To learn how to grow your own Bonsai tree, we’d recommend first to watch this short video and than continue reading this article for more in-depth information. The video shows a young Chamaecyparis pisifera (Cypress) plant, worth about $20. Enjoy watching!
How to grow your own Bonsai tree, in 3 steps
So, let’s have a look at the three steps to create a Bonsai tree (pruning, wiring and repotting).
Step 1: Pruning your Bonsai tree
First of all, we start to clean out the tree. Carefully study your tree, and decide on what shape you intend to create in it. While it is easy to prune branches, it can be very hard to make them grow back. Once you have decided which branches should be removed, prune these, slowly working your way up the tree. Start with freeing up the trunk a bit.
When pruning larger branches, you need a concave cutter. This cutter leaves behind a hollow wound, that heals much better. After pruning the larger branches, focus on smaller branches, until you are satisfied with the result. For detailed information on pruning, read our Pruning Bonsai trees guide.

Cleaning up the tree and removing all the dead branches

Pruning your Bonsai tree
Step 2: Wiring your Bonsai
Next, we wire the branches, starting with the larger ones. Carefully apply wire around the branches at an angle of about 45 degrees. Try to wire two branches of the same thickness with one wire. As a rule of thumb, apply wire about 1/3 the thickness of the branch.
When you’re done wiring the larger branches, work your way towards the smaller ones. Finish wiring the entire tree, before you start positioning and bending the branches. For more detailed information, read our “Wiring Bonsai trees” guide.

Wiring the Bonsai tree

The 45 degree angle while wiring
Step 3: Placing your tree in a Bonsai pot
Now that we have pruned and wired the tree, it is time to repot it. To get started, we prepare the Bonsai container. Place two wires that can be used later on to attach the tree firmly to the pot. We also cover the watering holes by attaching a plastic mesh. When the pot is ready, we prepare the soil mix. Usually a bonsai tree kit comes with premixed Bonsai substrate, but if not, check our website for more information.
Now remove the plant from its plastic container and get rid of any loose soil. We also want to reveal the trunk a bit. Carefully unravel the roots using a root-hook. To make the tree fit in the pot, you will need to prune away roots. You can prune up to about 1/3 of the total root mass. Now, put some soil in the pot.
The tree is now ready to be placed in the pot, but first, decide on what the front of the tree should be. Place the tree just off the center and attach it carefully with the wires that were attached in the pot earlier. Cover the roots with soil and by using chopsticks we make sure that the entire root-mass is filled with soil. When we’re done, we water the tree. Read our “How to repot my Bonsai tree” guide for more detailed information.

The mixed Bonsai soil

Unravelling the roots with a root hook

Placing the tree in the pot and attaching it firmly with wire

The repotted Bonsai tree after thorough watering

The starterkit

The result
That’s it! Now we have a Bonsai tree; pruned, wired and repotted. So what’s next? Remove the wire after a few months, otherwise the branches would get damaged as they grow thicker. Place the tree in the shade the first month after repotting. In this article we used a Chamaecyparis pisifera (Cypress) tree, but starterkits can contain any kind of tree species. Make sure you know what tree species you have (if you are not sure, try our “Identify my Bonsai tree species guide“), and look up its specific care guidelines in our “Bonsai tree types” section.

