There are many ways to decandle red and black pine bonsai. I don’t believe that some techniques are better or worse than others as I’ve seen many techniques used to great effect by professionals and hobbyists alike. Rather, each technique has its benefits and drawbacks. I tend to use several approaches during any given decandling season depending on the needs of the tree and my available time.
One-day approaches
A simple distinction among decandling techniques can be made based on the number of days required to complete the removal of spring shoots in a given season. The most efficient approach is to remove all candles on a given day. This approach makes the most sense when time is limited. Traveling professionals, for example, often take this approach when return visits to a customer’s home are impractical.
Removing all of a tree’s spring shoots on a single day gives summer shoots an equal amount of time to develop. Thus, the basic act of removing the spring growth does little to balance the weak and strong areas of the tree. The two most common techniques for balancing vigor when removing all of a tree’s spring shoots on a given day are pulling needles and leaving stubs. In order for these techniques to work properly, one must identify the strong and weak areas of the tree.
In general, upper branches are stronger than lower branches, and exterior branches are stronger than interior branches, but the most obvious indicator of vigor is the size of the spring shoot.
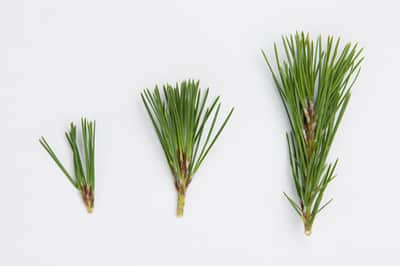
Small, medium, and large shoots
Reducing vigor in stronger areas can help balance the overall vigor of the tree. When taking the needle-plucking approach, this means we leave fewer needles in strong areas and more needles in weak areas.
- Strong areas – leave 3-7 pairs
- Medium areas – leave 5-9 pairs
- Weak areas – leave 7-12 pairs
The weakest areas – shoots with 1-3 pairs of needles – are generally left alone.
The stub approach is similar. We leave longer stubs in strong areas and shorter stubs in weak areas.
- Strong areas – leave long stub
- Medium areas – leave medium stub
- Weak areas – leave very short stub
See “Techniques for controlling vigor” for details.
Multi-day approaches
When preparing a pine for exhibit, I’ll often decandle the tree over a period of several weeks, removing groups of spring shoots every 10-14 days. We begin by removing the weakest shoots to give the summer shoots on these branches the longest time to develop. After dividing a tree into groups of relative vigor, we can decandle as follows:
- Remove all small shoots
- Wait 10 days
- Remove all medium shoots
- Wait 10 days
- Remove all large shoots
In practice, this might look like the following.
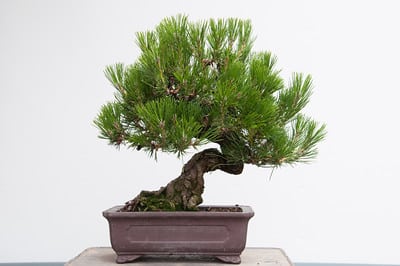
Day zero – before decandling
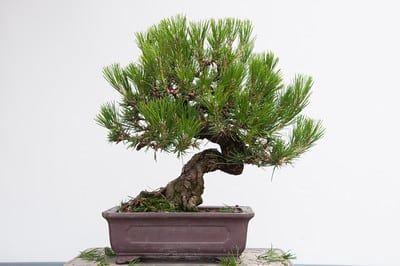
Day zero – after removing small shoots
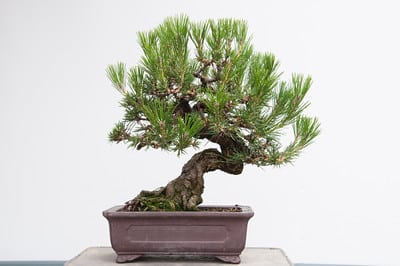
Day 10 – after removing medium shoots
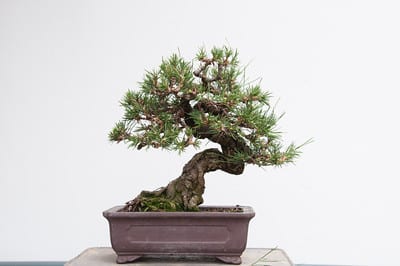
Day 20 – after removing large shoots
Putting it all together
Decandling can become interesting when we start to combine techniques. For example, after removing all of the spring shoots from the above pine, I pulled needles from the strong areas to further reduce their vigor.
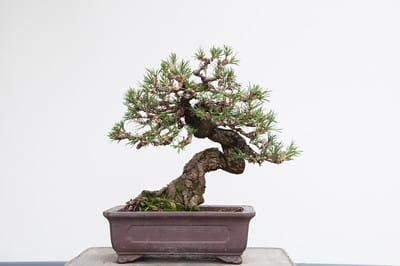
Day 20 – after pulling needles
As an alternative to pulling needles, I could have left stubs in the strong areas. Or I could have combined all three approaches. In short, we can combine any number of approaches to decandling red and black pine bonsai.
Considering the number of options this leaves us with, it can be difficult to know where to begin. Experience is our best guide here. But as hiring a professional to work on our bonsai or taking our trees to a workshop with an experienced teacher isn’t always an option, we may be navigating these options alone. Which is fine. Simply starting with a best guess and learning from the results is a great way to learn how our trees respond to decandling. I’ll provide a starting point for this approach next week.
✕
Subscribe to Indian Bonsai Art
New Posts Delivered Every Tuesday and Friday
